This short guide introduces the art of wildlife photography for the safari goer. It’s designed for non-professionals, offering practical advice to help you capture amazing safari sightings, and return home with some high quality memorable images worthy of your safari experiences.
LIGHT, REACH AND WEIGHT
LIGHT
Photography is ultimately all about “the light”, but it should be about more than just getting the sensor/film exposed correctly. It should be about using light CREATIVELY.
Backlighting, side lighting, front lighting, high-key and low-key treatment of the same subject can yield dramatically different images. Neither of the following two images illustrates “ideal” lighting but both yield pleasing results.
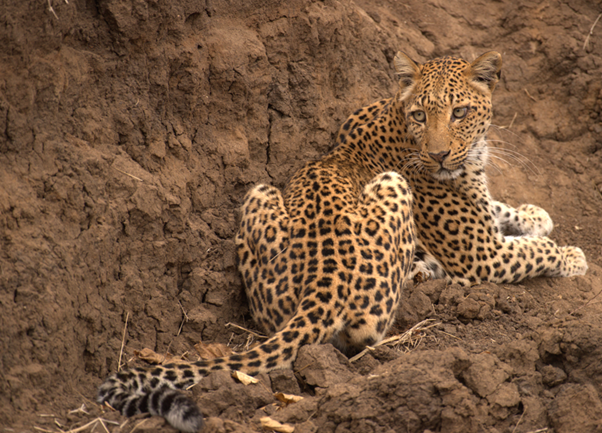
The image of the leopard was taken in Zambia (2022) at around
noon on an overcast day. She was hunting and totally ignored us
and our vehicle and was focused solely on the sound of potential
prey from behind. Whatever she heard stopped her stalking along the
dambo and caused her to look back.
The image is uniformly exposed but without any modelling shadows and,
unfortunately, no “highlight” in the leopard’s eyes - The light was flat.
Nikon D810; Aperture priority; 200-500mm at 500mm; f/5.6; 1/500s;
Auto ISO 560; 11:29 hrs.
Although taken on a wide aperture there is  just enough
depth-of-field to render the entire animal in-focus
except the front paws which are a little ”soft”.
Given the angle-of-view of the Nikkor 200-500mm at 500mm
this leopard was less than 10m away.
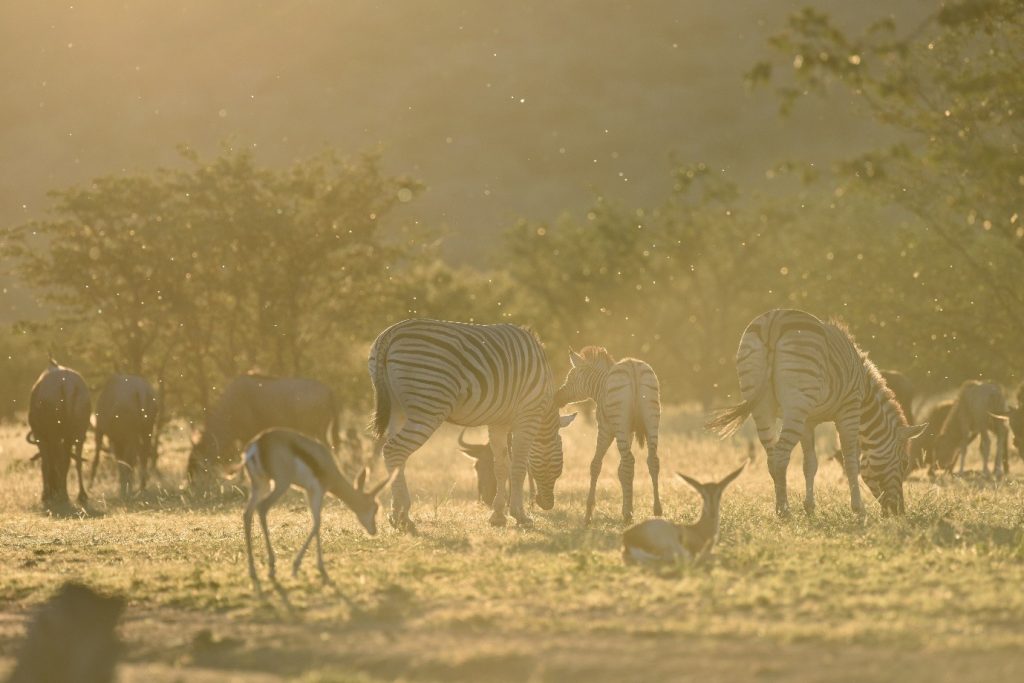
The image (above) of the zebra and antelope (Springbok and Wildebeest)
 is another example of taking a photo under “less-than-ideal”
lighting (backlit).
We were out of the vehicle for sundowners and facing the setting sun
when we noticed that the air was full of dust and pollen giving the
scene this overall golden glow punctuated by the dust/pollen diamonds.
Namibia (2017); Nikon D810; Aperture priority; 200-500mm at 410mm;
f/5.6; 1/800s; ISO 800; 17:46 hrs.
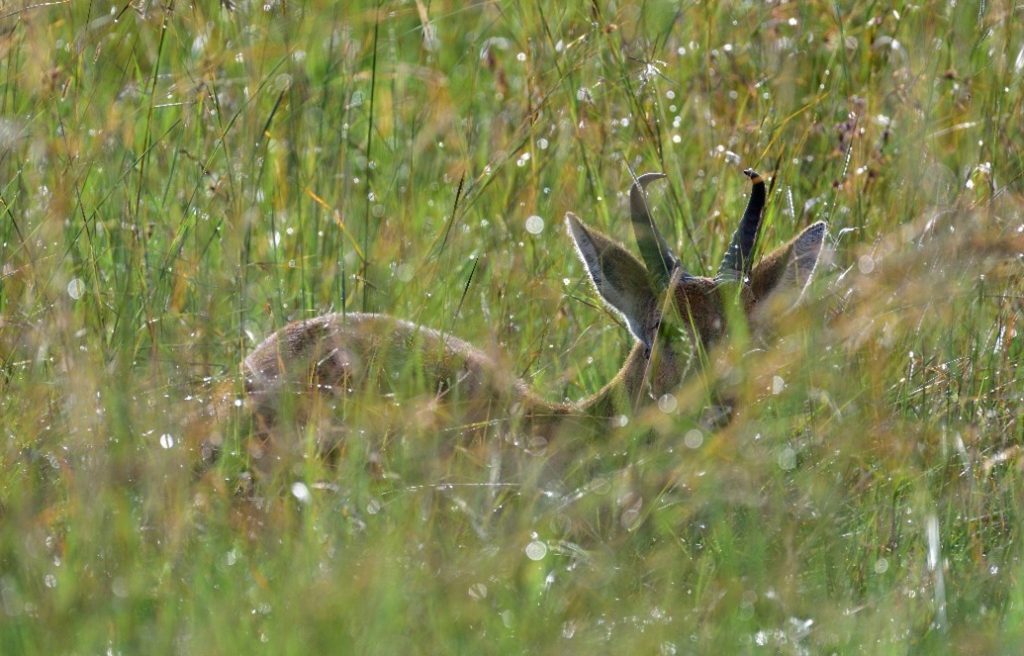
Bohor Reedbuck, Masai Mara, Kenya (2024). Nikon D810; 200-500mm at 500mm;
f/5.6; 1/200s; Matrix metering; Auto ISO 64
Bohor reedbuck like it wet and tend to inhabit wet grassland, swamps
or woodland. After days of torrential rain on the Mara this male
Bohor Reedbuck must have been in heaven.
The antelope was hiding in dense sodden grass and backlit making
autofocus impossible. I focused manually.
The out-of-focus water droplets and backlit fringe around
the animal created this jewel-like effect.
The exposure triangle relates aperture, shutter speed and ISO. In the early morning and evening light level will be lower so you will be best served setting the largest aperture available on your lens together with a shutter speed that suits the activity you want to record. A rule-of-thumb shutter speed is 1/focal length of your lens, e.g. for a 600mm lens the shutter speed would be 1/600s. Now that you have selected the aperture and shutter speed let your camera manage the ISO (use AutoISO). The image processing capabilities of cameras released in the last few years are much better at handling the electronic noise under low light conditions than previously so, ISO values of 6400 or even 12800 are very usable and yield quite noise-free images. Keep an eye on the ISO as the light level increases and increase the shutter speed and reduce aperture to match your brighter subject.
REACH
You need to be sensitive to your subject, whether that’s human or wildlife. Each subject has different tolerances for intrusion, for example: how close can you get before triggering the fight or flight reaction in animals. If you are photographing wildlife from a vehicle (accompanied by a guide) the animals wellbeing will come before your desire to “go closer”. Over time wildlife in conservancies becomes habituated to vehicles often allowing closer approaches than elsewhere.
However, the wellbeing of the wildlife ALWAYS comes first. We frequently have the guide reverse our vehicle from a sighting to avoid encroaching on the subject’s “space” as we depart.
If you are on foot then your safety will generally dictate how close you can approach, especially to predators or other dangerous animals.
It’s even more important to be sensitive to your subject when self-driving because you won’t have a guide to advise you. Private reserves and national parks have different rules about driving off-road (bundu-bashing) to get closer to wildlife.
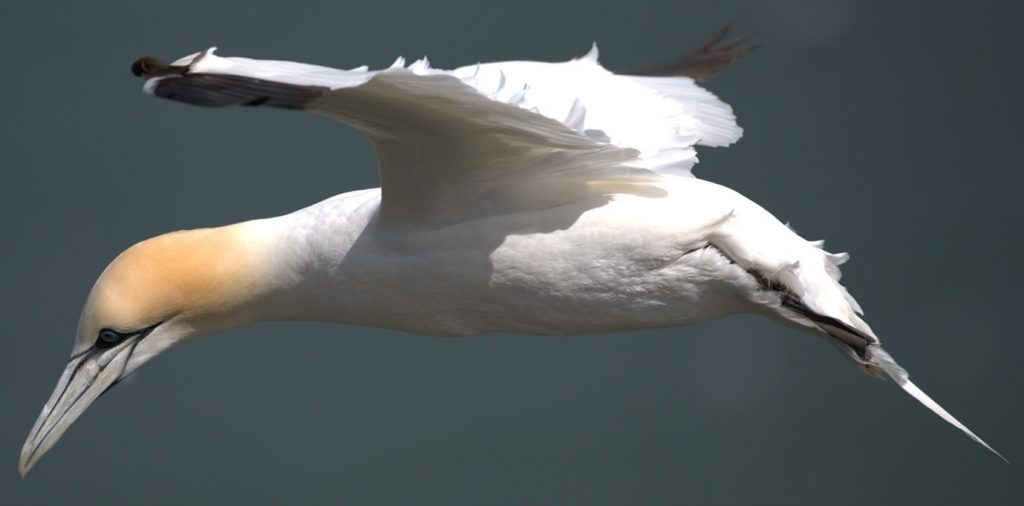
Northern Gannet, RSPB Bempton Cliffs (2025)– Nikon D810;
Aperture priority; 200-500mm at 500mm; f/5.6; 1/500s; Auto ISO.
It was blowing a gale, and the gannets were never still.
The highlights on the upper surface of the wing and body are a
little “blown out” (lacking detail).
The wing tips are out-of-focus because the selected aperture
(f5.6)results in a shallower depth-of-field. But then this adult gannet
has a wingspan of nearly 2m!
The wide aperture isolates the bird and renders the grey sea pleasingly
out-of-focus. The angle-of-view of a 200-500mm lens at 500mm and the image
crop suggests this bird was at least 10m from the camera.
Typically, any African wildlife will be several metres to several tens of meters away from you meaning you need a medium to long telephoto lens to get your subject to be an acceptable size in your image – especially when photographing birds.
Lenses suitable for photographing animals (other than birds) will typically range from 200mm to 600mm. Lenses suitable for photographing birds will typically be 400mm and greater – some photographers use 1.4x or 2x teleconverters. A 2x teleconverter will extend a 600mm f/4 lens to 1200mm f/8 but the increased f-stop number makes the combination less usable in cloudy or fading light conditions and more difficult to hand hold. Modern cameras (such as the Canon R5/R6 and Nikon equivalents) have such good image processing technology that they can tolerate higher ISO settings than with previous generations of DSLR cameras.
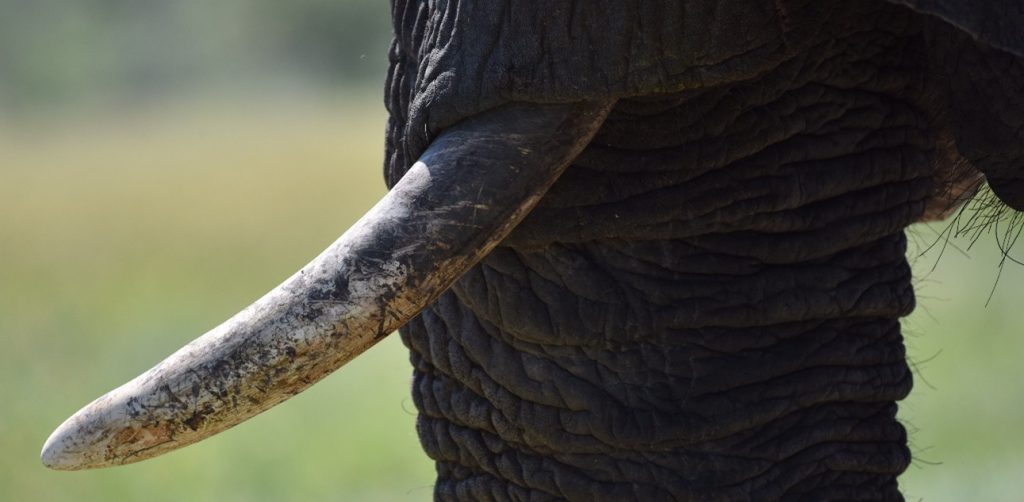
Nikon D810; Namibia (2017); Aperture priority; 200-500mm at 500mm; f/5.6;
1/1000; ISO 250; 12:07 hrs. I particularly liked the patination on the
elephant’s tusk – it resembled scrimshaw.
I wanted to isolate the elephant from the background with a wide aperture.
I could have reduced the ISO to 100 or 64 but it was a
“hangover” from previous images.
The good light and choice of aperture and ISO that pushed the shutter
speed to 1/1000s was not an issue.
There’s enough skin texture in the shadows, the highlights on the tusk
aren’t “blown out” and the focus is sharp while the background is blurred.
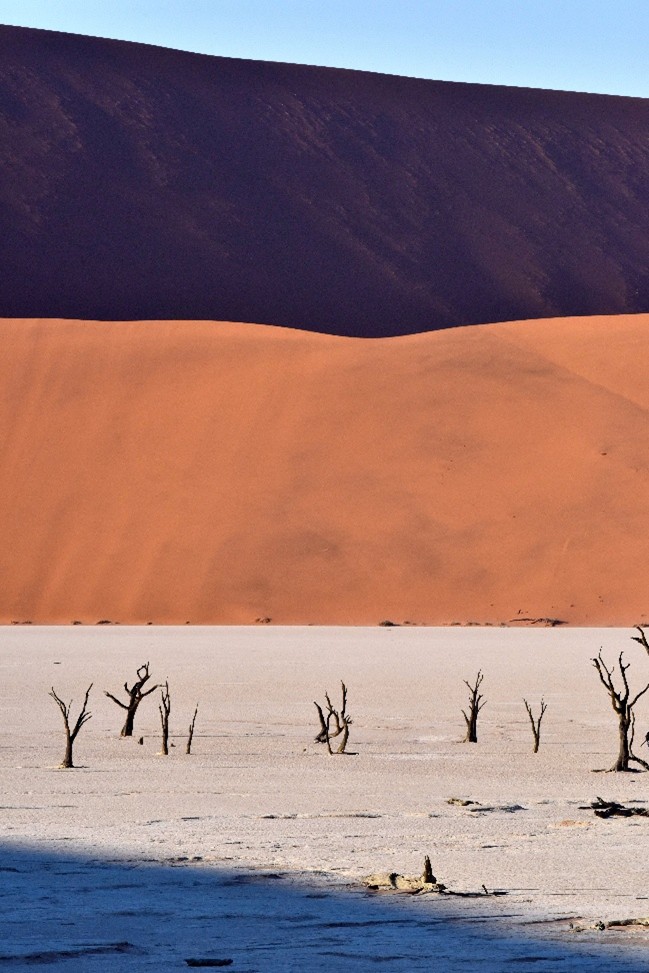
Namibia (2017); Nikon D810; Aperture priority; 200-500mm at 270mm; f/14;
1/1000s; ISO 1000; 08:50 hrs. I like this image of Dead Vlei because the
symmetry and bold slabs of colour suggest a graphic art poster.
WEIGHT
To satisfy the REACH needed to photograph subjects at some distance invariably requires a heavy lens. For example, a Canon EF 600mm f/4L IS III USM weighs over 3kg. A Nikon F-mount AF-S 600mm f/4E FL ED VR lens weighs 3.8kg. Compare these to a Nikon NIKKOR Z 180-600mm f/5.6-6.3 VR lens which weighs just under 2kg. The Canon RF 100-500mm f/4.5-7.1L IS USM weighs a shade over 1.5kg. These “slower” lenses weigh less because their glass elements are smaller. In some circumstances the slower/lighter lenses do not afford quite the control over the depth of field that might be desired but are more accessible to most photographers.
Over the 30-years of our travels in southern Africa and as camera technology has changed, we have refined our safari camera equipment to three bodies with three lenses permanently attached:
We use a Nikon Z6iii with 180-600mm zoom telephoto lens, a Nikon D810 with 200-500 zoom telephoto lens and a Nikon D7200 with an 18-200 zoom lens. Other camera manufacturers are available.
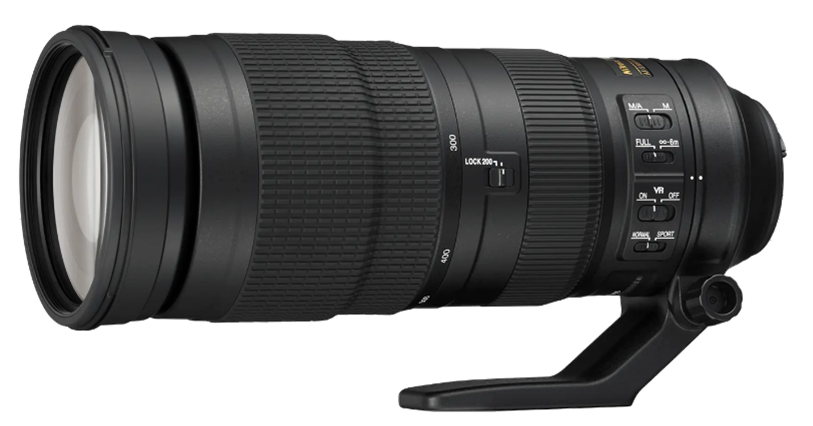
Nikon Nikkor 180-600 /f5.6-6.3
Of our cameras and lenses the Z6iii has the best ability to capture bird action and is the most capable for video. The D810 has the largest sensor (36MP) and produces the largest images (we produce A3 size coffee table books from our travels so appreciate the ability to crop large image files). These photobooks are beautiful records of our trips and show far more detail in greater clarity than viewing images on a mobile phone.
The D7200 is used primarily for, static/wide-angle subjects – for scenery, people, etc.
A3 size photobooks, here from Yellowstone, USA and
Namibia make beautiful records of our trips.
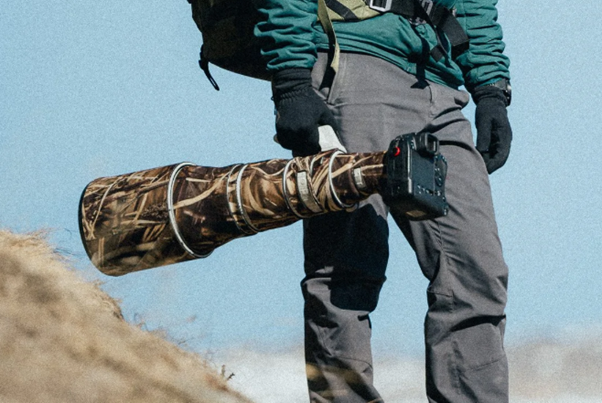
Canon R3 + 600mm f/4. The sort of kit a professional might use.
One of the major benefits of the Z6iii and the D7200 is the user definable configurations saved to rapidly selectable U1/U2 options on the Mode Dial and, in the case of the Z6iii an additional U3 option. Our default configurations on the Z6iii are:
U1, set for birds (3-D tracking focus mode, bird detection scene recognition, continuous autofocus, 15-frame pre-burst image capture, fast 1/3200s shutter speed, maximum aperture f5.6 and Auto ISO). U1 settings act as the base, typically for shutter speed, which can be instantly increased when imaging small or small AND fast birds (e.g. Kingfishers) by rotating the command dial.
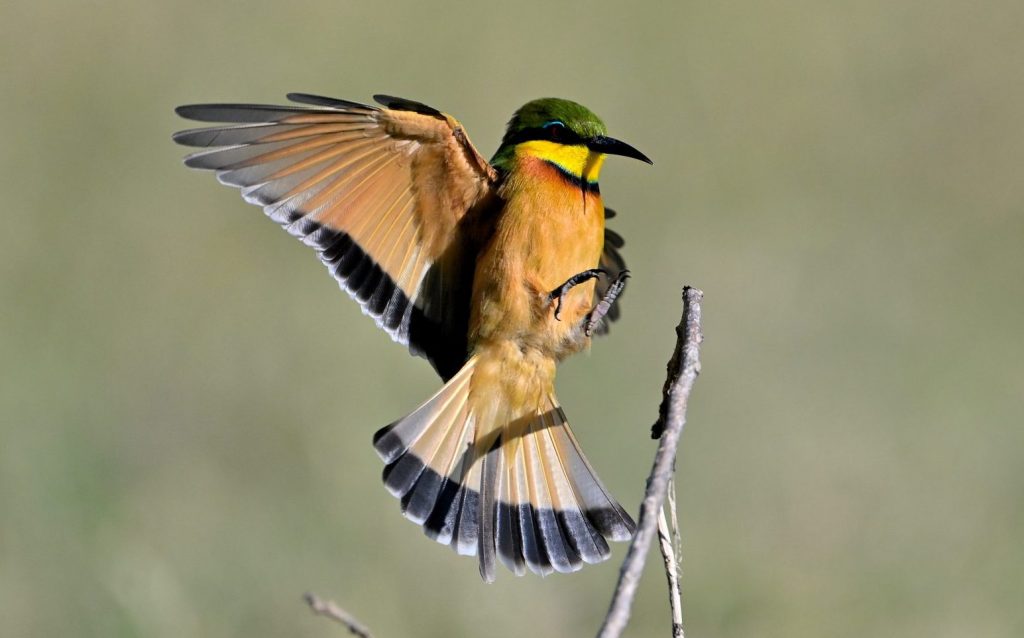
Little bee-eater returning to its hunting perch.
Okavango Delta, Botswana (2026).
This image was taken when sitting about 4m from the bird.
Nikon Z6iii; 180-600mm @ 600mm. U1 settings.
U2, set for subjects that move more slowly than birds and have bigger bodies requiring greater depth-of-field, e.g. mammals. U2 is set for 3-D tracking focus mode, animal detection scene selection, continuous autofocus, continuous high-speed image capture (release mode), 1/1000s shutter speed, a wider aperture f6.3, Auto ISO) and
U3, set for static image capture (single shot, AF-area mode subject detection, matrix exposure metering, 1/200s, f10, Auto ISO).
U1,U2 and U3 are default settings for specific scenarios, and each setting can be rapidly changed. U1/U2/U3 give effective control of aperture and shutter speed from the main and sub-command dials.
We have a subset of menu options configured as “My Menu” and accessed with a programmable button (Fn2) which allows the most used functions and settings to be accessed quickly.
We also have programmed one of the function buttons to cycle through the AF-Area modes changing the mode every time the button is pressed. You can restrict the number of AF-Area modes so that those you find most useful are readily available for those times when your subject is obscured by objects in the foreground making focusing difficult. Of course, there is always the ability to instantly switch to manual focus.
Similar features are available with Canon and Sony brands too. experience.
WHY?
Why does any of this matter? Weight, ambient conditions and reaction time are all key factors when “in the bush”.
Baggage: is typically limited to 20kg on internal flights by light aircraft. If you are not a professional photographer, you will most likely have a 20kg weight limit for your hand baggage and checked baggage – 20kg covers EVERYTHING: camera kit, clothing and other personal items. As a professional, you’ll likely pay for extra baggage allowance or reduce your clothing (the camps will wash most items in 12/24hrs.) We know one professional photographer (who has images published in National Geographic) who only travels with a carry-on bag. He claims that he goes home once his clothes “stand up on their own”. You can’t always rely on the camp washing your clothes – washing maybe, getting your clothes dry when it has been raining for two days and the humidity is at maximum occasionally means packing still wet clothing in zip-lock bags if you move camps on an extended trip! It’s best to be prepared.
Ambient-conditions/Reaction-times: A professional will typically carry multiple cameras with lenses of different focal lengths attached (see REACH). This enables them to capture different photographic opportunities without having to change lenses in potentially difficult conditions (typically dusty). A Nikon Z9 with a 600mm lens fitted will weigh (approx.) 4.6kg (and the combination costs £20,000 new). Some professionals will carry this combination of Z9/600mm and two other similar cameras (e.g. Z8) with medium telephoto/zoom and wide-angle lenses permanently attached. This helps combat the adverse environmental conditions and to react fast when the action happens but comes with weight (and cost) penalties.
At some point you’ll probably have to schlep that heavy camera/lens combo (or multiple cameras and lenses); it could be hot, dry and dusty.….
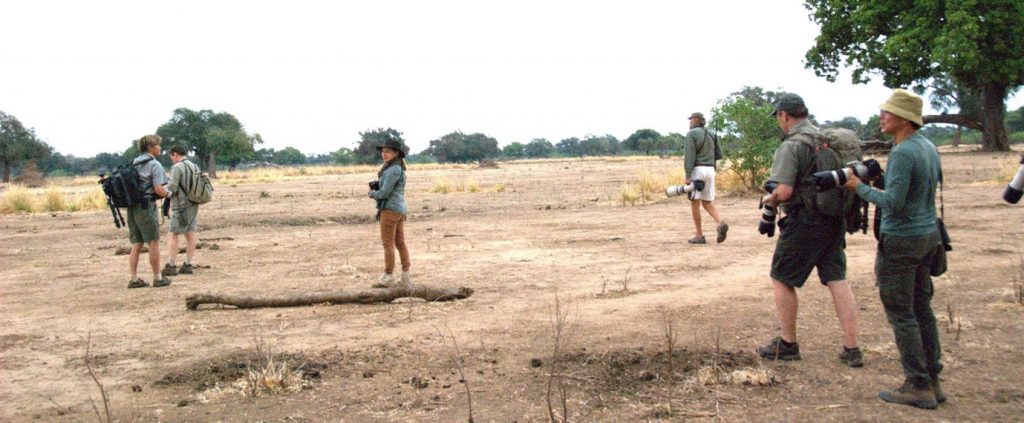
Mana Pools, Zimbabwe (2013) – with Stretch Ferreira
If it all gets too much you can always lie down….
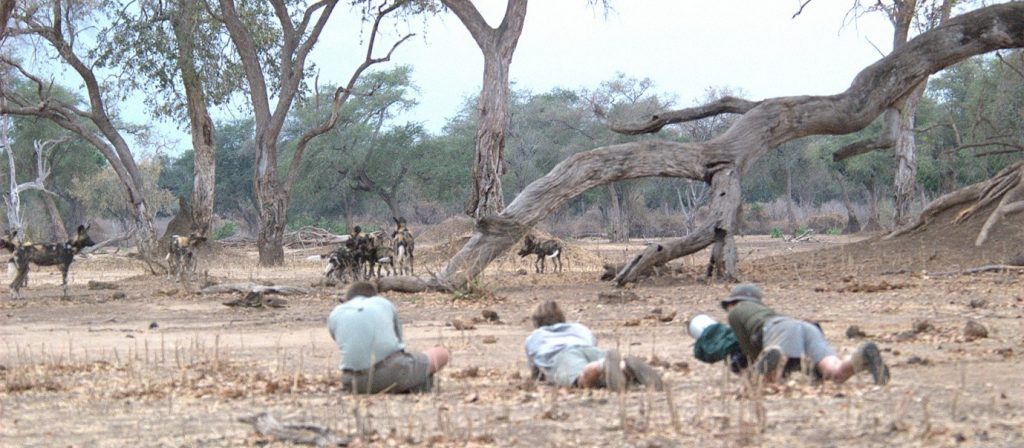
Mana Pools, Zimbabwe (2013).
Tracking wild dogs on a hunt with Stretch Ferreira.
After 30-years travelling and photographing in Africa Kath and I now travel with a basic kit comprised of:
Nikon Z6iii plus 180-600, Nikon D810 plus 200-500 and Nikon D7200 plus 18-200.
These Nikon cameras have the added benefit in that they all use the same batteries so require only 1 type of charger. We take extra batteries. The lenses are reasonably fast with maximum apertures that are usable in the low light at either end of the day. The weight is acceptable – they travel as carry-on baggage. The z6iii plus 180-600 and D810 plus 200-500 combinations travel in a KF Concepts backpack as hand/cabin luggage.
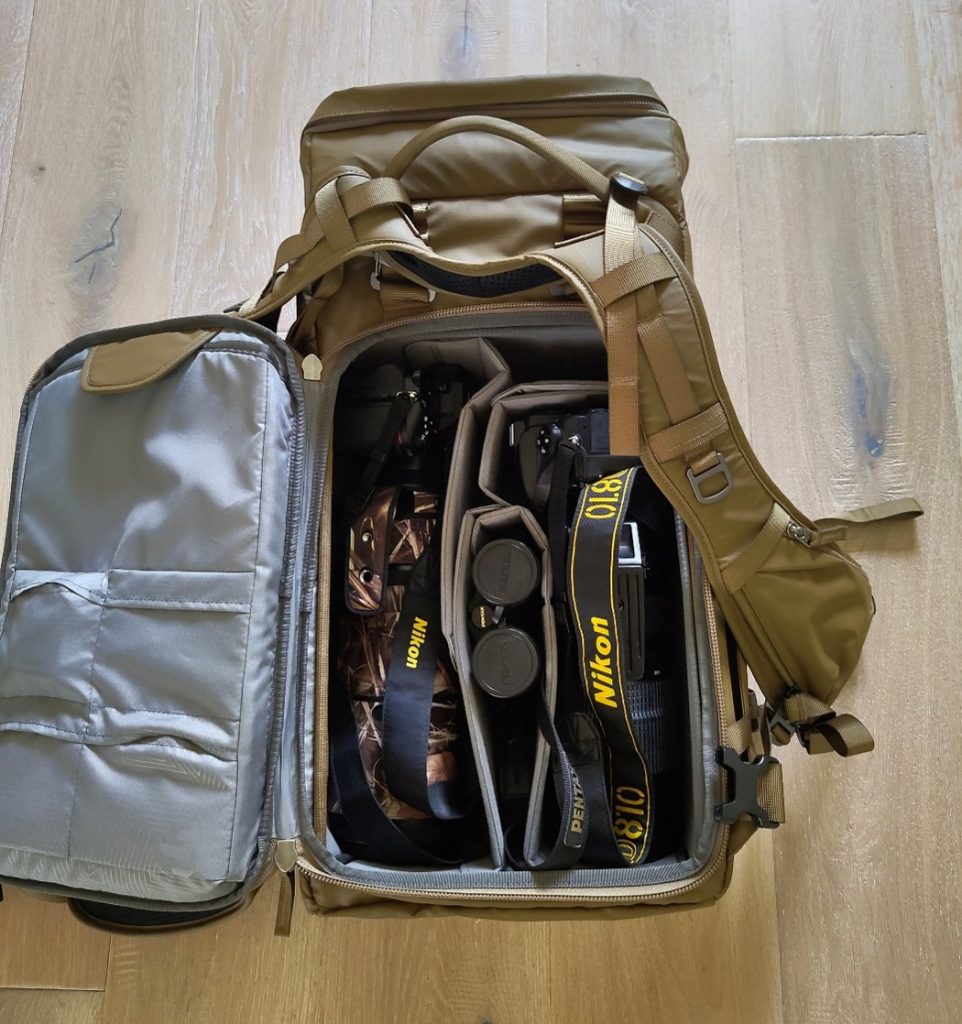
All up our camera gear and clothing max out at a total of less than 40kg (roughly 20kg each) – meeting international and domestic weight allowance and baggage sizes. In the KF concepts backpack the camera section is well protected and secure while the top section holds passport and travel documents, spare clothing (in case our checked bags don’t show) with refillable drinks bottles in the side pockets.
BRIDGE CAMERAS, etc.
There are alternatives to mirrorless/DSLR and even SLR (a resurgence in interest in analog/film) cameras.
Consider used equipment: Wildlife photographer and broadcaster Chris Packham frequently uses second-hand camera equipment and is a vocal advocate for the circular economy in photography.
Alternatively, there are Bridge cameras……. and even the ever-present mobile ‘phone.
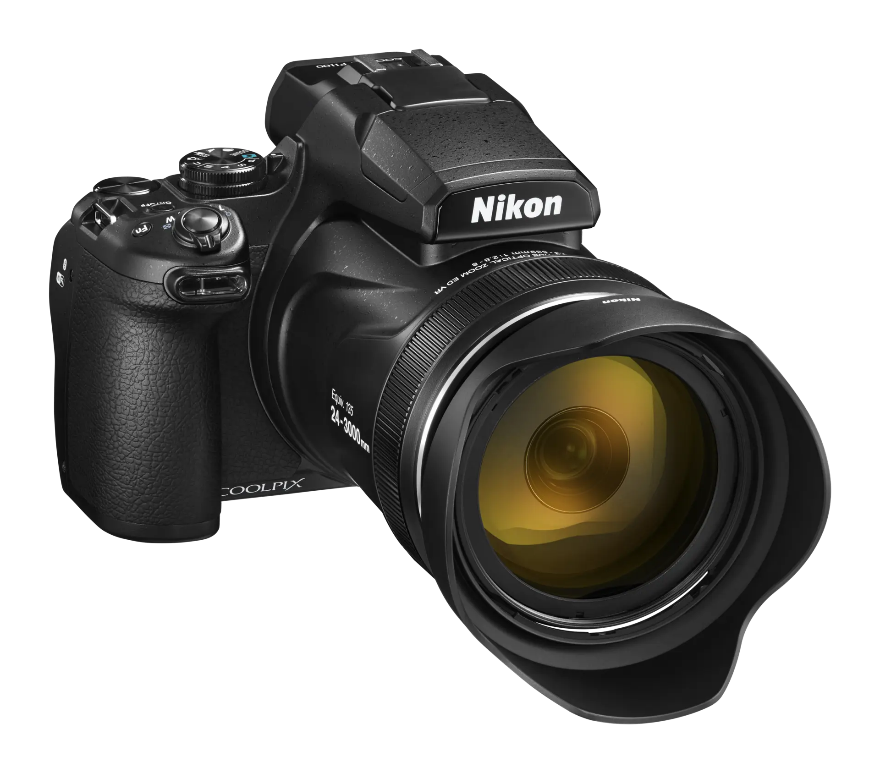
Nikon Coolpix 1100 125x Zoom (24 to 3000mm)
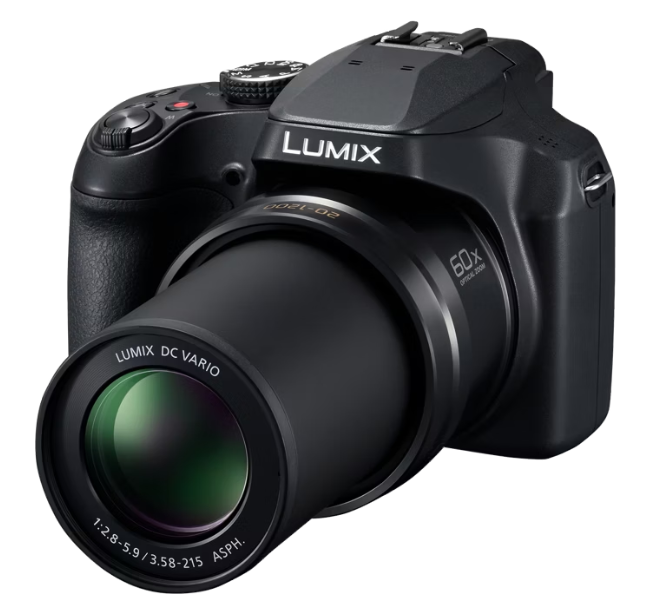
Lumix 60x Zoom (20 to 1200 mm)
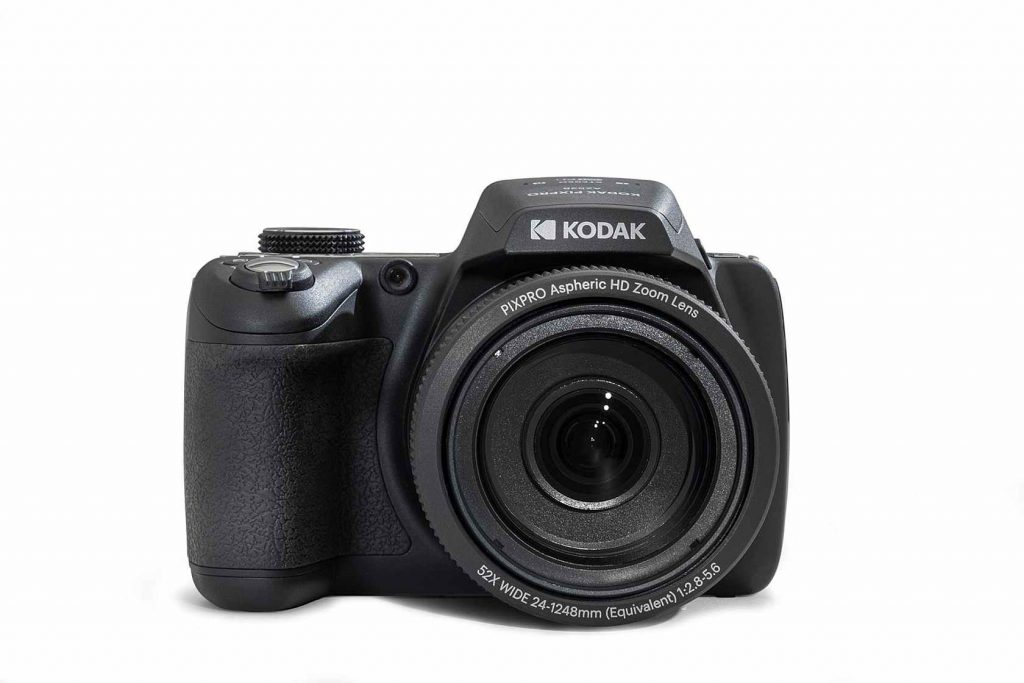
Kodak Pixpro 52x Zoom (24 to 1248mm f/1.28-5.6)
RULES
Safari photography has “rules”.
THE NUMBER 1 RULE?
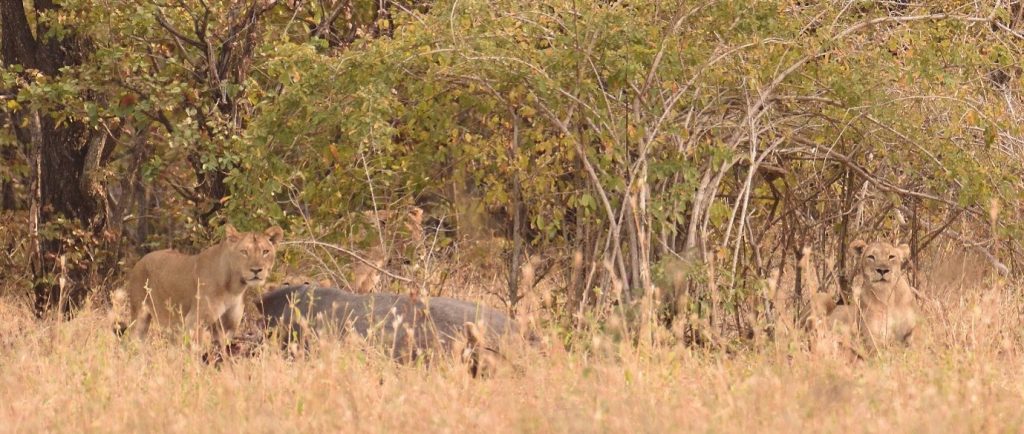
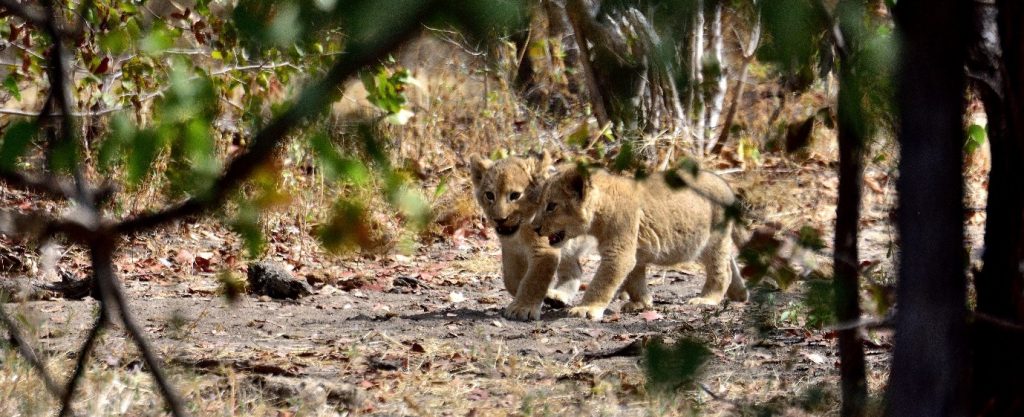
The Number 1 Rule is…..GET OUT THERE! Your photos won’t take themselves and, unless you spend time in the bush you will never stand a chance to capture those special moments. There are no guarantees that you’ll see anything at any time, after all you are in the African bush, not a zoo. But knowing something about your targets you can prepare. Discuss with your guide what has been going on, who saw what or heard what in the night. While chatting with our guide one evening we learned that a member of the camp staff heard lions calling while collecting firewood in the afternoon. Early the next morning we drove to where the lions had been heard. We left our vehicle and tracked on foot for 30 minutes in dense bush to get comfortably within 100 metres of 5 lionesses and their hippo kill. We also saw movement that we thought were cubs. Not safe to get closer on foot we retraced our steps and used our vehicle to get closer safely through the dense bush. We were able to take the first images of the two new cubs – their first outing and the first images of them. The third image below is of the two conspirators making their first escape from mum.
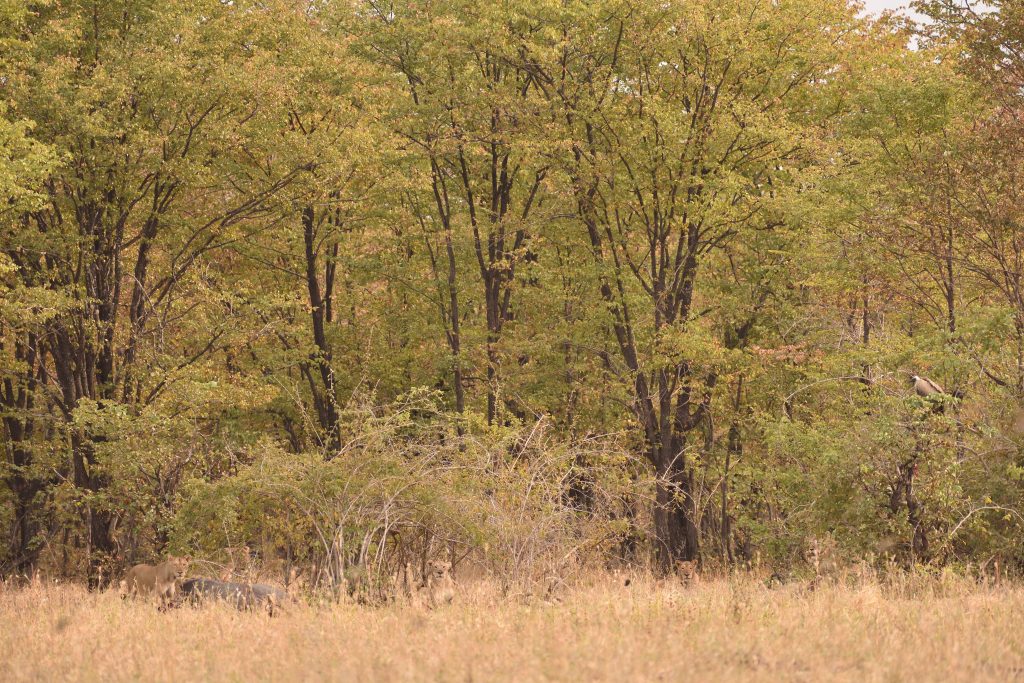
The image (above – hugely reduced in scale) of 5 lionesses with their
hippo kill. We were on foot.
We had tracked these lionesses for about 30 minutes through thick bush.
Zambia (2022); Nikon D810; Aperture priority; 200-500mm at 500mm;
f/5.6; 1/500s; ISO 800; 07:04 hrs.
Below: a 100% crop from the bottom left corner showing
three of the lionesses.
Lions are active predominantly at evening, night and dawn (crepuscular and nocturnal) so the best time to catch them active is before/after sunset and before/after sunrise. The rest of the time they tend to sleep! In the evening the pride will be regrouping and often contact call. In the morning you’ll be lucky and find the pride with a kill. If the pride has cubs then the cubs can be active at any time.
Leopards are the great opportunists. These stealthy hunters can stalk pray at any time. You may even be lucky and find a leopard preparing to drop on impala or puku from a sausage tree in the middle of the day.
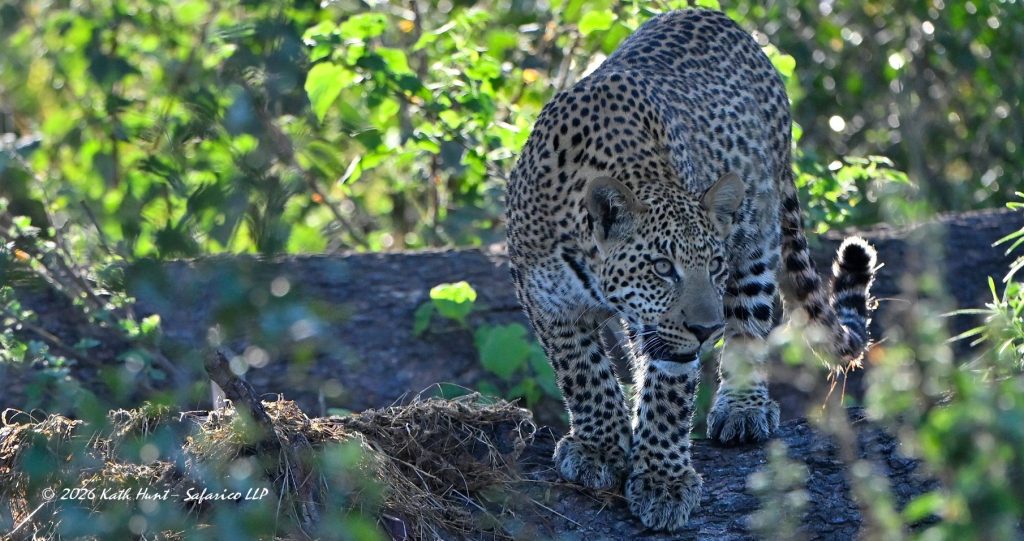
Female leopard.
Kanana, Okavango Delta, Botswana (2026); Nikon Z6iii;
Manual; 180-600mm at 330mm; f/6; 1/2500s; ISO 1800;
AF-C; 3D tracking; 07.29 hrs.
Cheetahs rely on sight to hunt so are active during daylight hours often in the heat of the day when their muscles are warm and other predators are sleeping. We spent almost an entire day in the company of a female cheetah and her cub. First, she stalked some Grants gazelles before being spotted by an Eland that raised the alarm and the hunt failed. Then after several more hours of walking, she again hunted a group of Grants gazelles before killing a Thompsons gazelle that none of us had noticed.
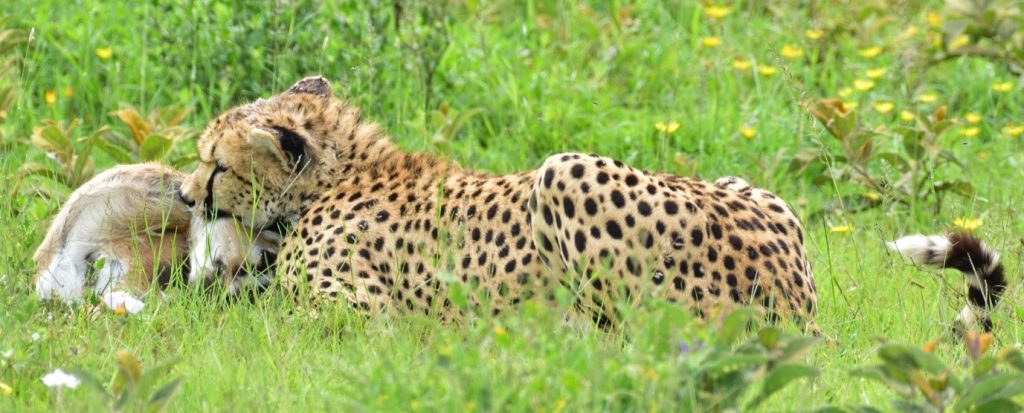
The female cheetah and Thompson Gazelle.
Serengeti (2024).
Nikon D7200; Aperture priority; 200-500mm at 500mm;
f/7.1; 1/640s; ISO 320;+1.0EV;  16.19 hrs.
Professional photographers are perhaps going to spend 4 to 6 times as long in the bush as you are and can afford to take time to understand their locations, work with the guides over extended periods to capture those fantastic images and sit for long periods.
THE NUMBER 2 RULE?
Change your viewpoint. Photography while seated in a vehicle or always standing when photographing on foot will result in a stilted perspective.
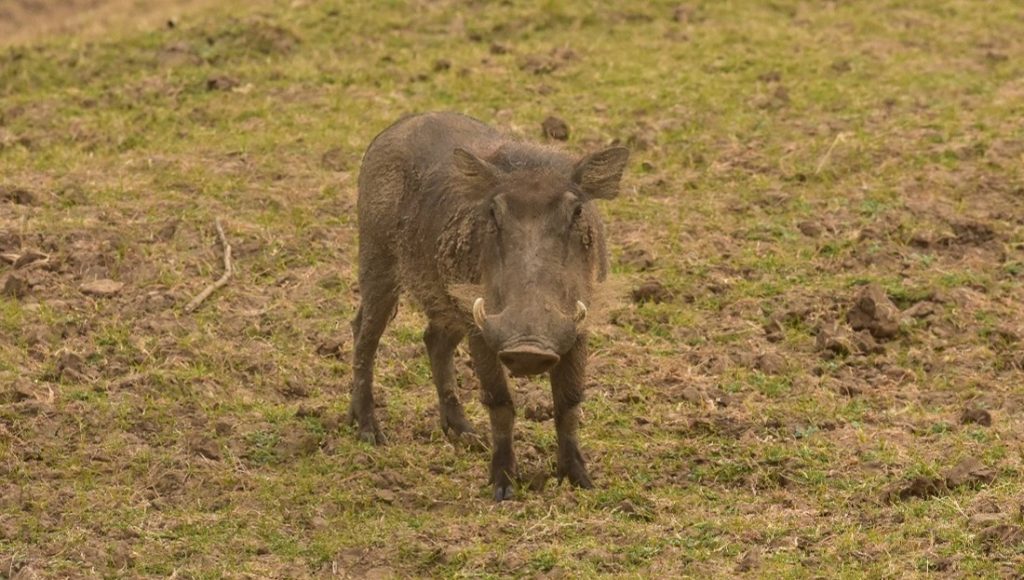
A classic image of an animal, in this case a warthog.
Photographing while sitting in a game drive vehicle gives
a certain perspective but may include too much ground
meaning the subject gets lost
and is not isolated from the surroundings.
Try to capture your subject at, or preferably below their eye height (or from above if you can use a drone). NOTE: Drones are banned in National Parks.……..
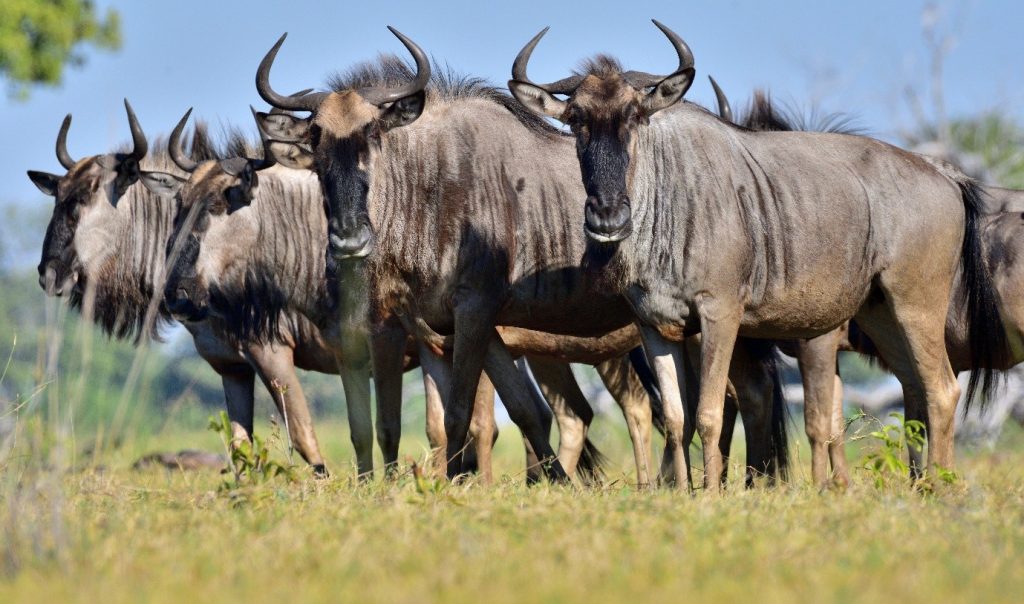
Even the humble wildebeest can look more interesting the lower you get.
Botswana (2026); Nikon D810; Manual; 200-500mm at 500mm;
f/9; 1/500s; Auto ISO 220; 08:29 hrs.
Water level
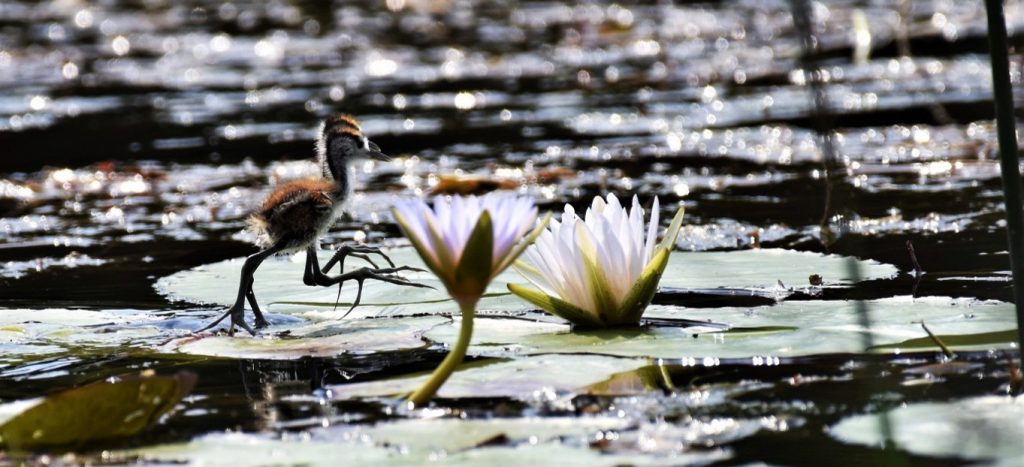
Jacana chicks photographed from just above water level.
Botswana (2017); Nikon D810; Aperture priority;
200-500mm at 500mm; f/5.6; 1/3200s; ISO 400; 15:57 hrs.
Looking up
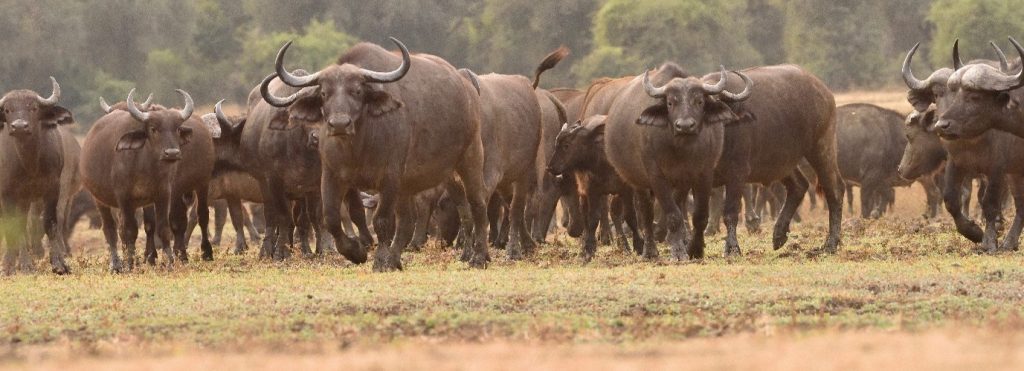
This large herd of Buffalo were heading to the river for a morning drink.
I lay on the ground as the herd approached to get a different angle.
Zambia (2022); Nikon D810; Aperture priority; f/8;
200-500mm at 270mm; f/8; 1/500s; Auto ISO 4000; 07:30 hrs.
Or, lions from below.
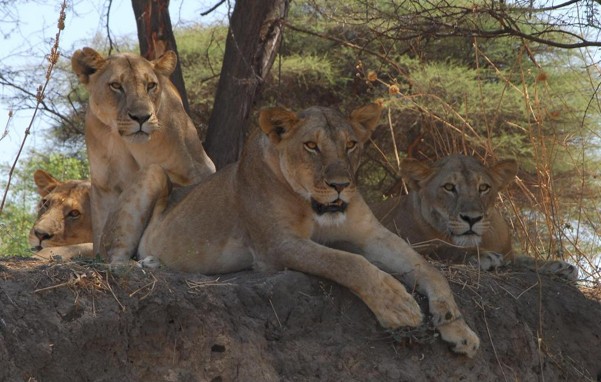
Ruaha NP, Tanzania (2018). Nikon D200; 24-120mm at 66mm;
f/18; 1/60s; Matrix metering; ISO400.
These lionesses and their adolescent cubs were following buffalo
to the river. In this image they stopped in the shade of a
tree on the riverbank.
We were able to get the vehicle below them and to within a few metres.
Looking down
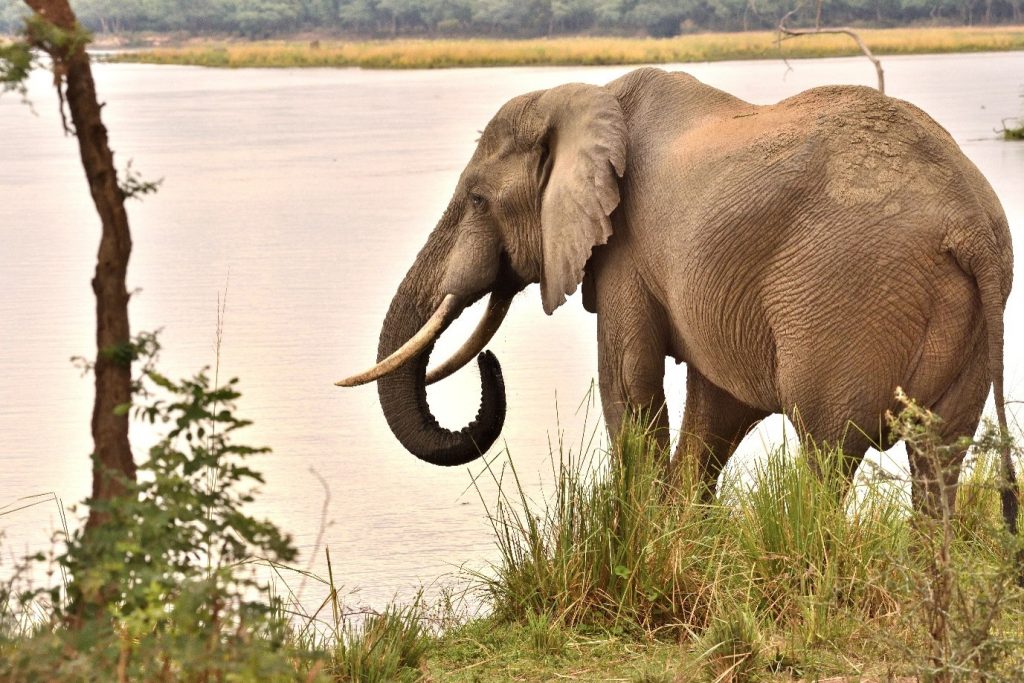
It's not often that you get the chance to photograph an elephant
from above, and on foot.
This elephant was below me drinking from the Zambezi.
I ensured that it was aware of my presence but was quiet and careful
to make deliberate movements so that the elephant knew I was there.
Zambia (2022); Nikon D810;
Aperture priority; 200-500mm at 200mm; f/10; 1/800s; ISO 800; 13:58 hrs.
Or, simply: At Eye Level
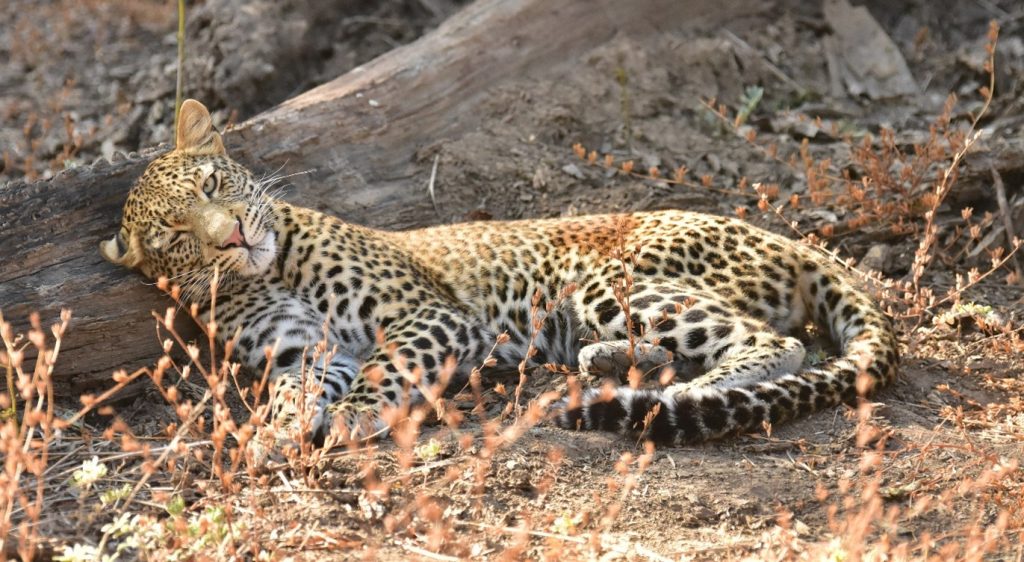
A client’s image of a sleeping leopard that opened
just one eye to check what was going on.
Zambia (2022); Nikon D7200. 70-200mm @ 150mm.
f/2.8. 1/4000s. ISO 1250.
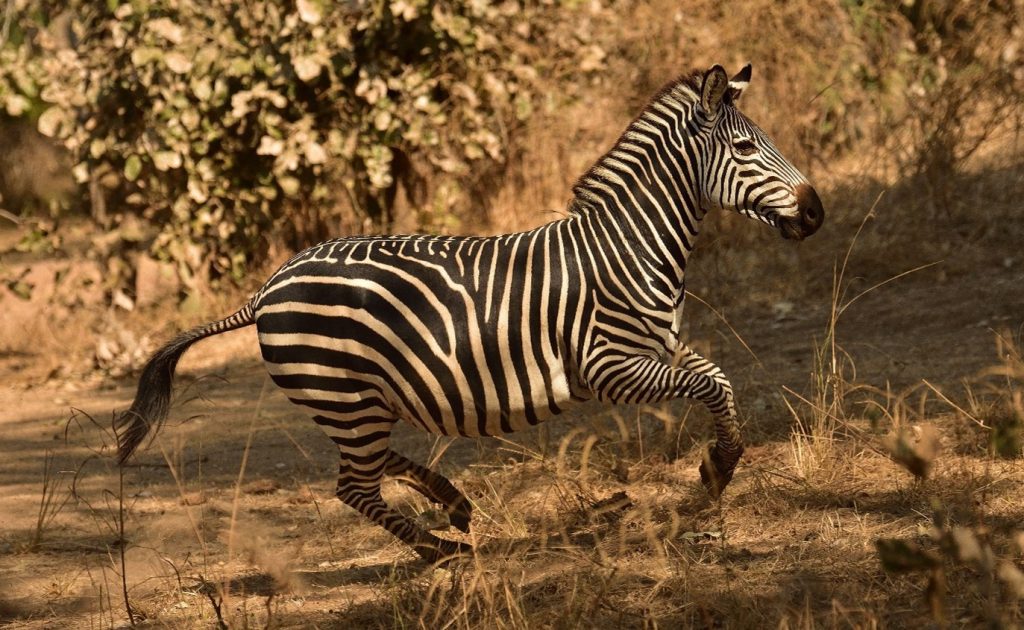
Another game drive vehicle approached where we were watching
a small group of Crayshay's zebra in woodland.
One of the guests from the other vehicle got out.
This caused a general panic among the zebras.
I managed to grab a guests’ camera and catch this image of the stallion
as it broke into a gallop
around the back of our vehicle.
Zambia (2022). Nikon D7200;  70-200mm at 145mm;
f/2.8; 1/8000s; ISO 400; 15:52 hrs
THE NUMBER 3 RULE?
Focus, Focus, FOCUS!
You can do a lot in post processing to correct exposure, white balance, errant twigs and grass, etc. but no amount of sharpening will make an out-of-focus image look good.
Most modern mirrorless cameras now offer an almost bewildering menu of aids to ensure good focus. Our Z6iii has fabulous eye tracking and focus modes for all sorts of different subjects. It’s not perfect. For example, busy backgrounds can suddenly make the focus point move from the subject to something the camera thinks fulfils its programming better at that time. Focusing is the subject of an entire course in its own right and not part of this blog. In the case of the Z6iii there is a subset of 4 topics that govern autofocusing:
- Focus Mode
- AF-Area Mode
- Subject Detection and
- Focus Point Selection
Focus Mode considers whether the camera will alter its focus as the subject moves (AF-C = Continuous Autofocus) or remains locked on a specific distance to a point in the frame (AF-S = Single point Autofocus) or Manual focus.
You select the AF-Area Mode depending on how you want the camera to choose the focus point when Autofocusing – essentially the number and type of sensors to use to determine the focus point. The camera uses deep-learning, contrast, colour and depth of information to determine, for example, what is a face or eye and where is it located in the focus area. The focus areas can be selected from a tiny pinpoint to the entire screen with pre-set of customisable areas in between – see the icons for the Focus Areas below.

Subject Detection – this is how the camera prioritises the focus point when Autofocusing. Users can select from:
[Auto], [People], [Animal], [Birds], [Vehicle], [Airplanes]
Focus Point Selection – This enables the user to manually select the focus point in any AF Focus Mode except Auto-area Autofocus.
THE NUMBER 4 RULE?
Enjoy your photography but remember it’s also a holiday. So, sit back and enjoy the moments – Look, Listen and Smell. Put down your camera from time to time and use your binoculars. Use that wide-angle to capture the context of the moment – get your guide to include you in a photograph.
Remember: wherever you look there is so much to see!
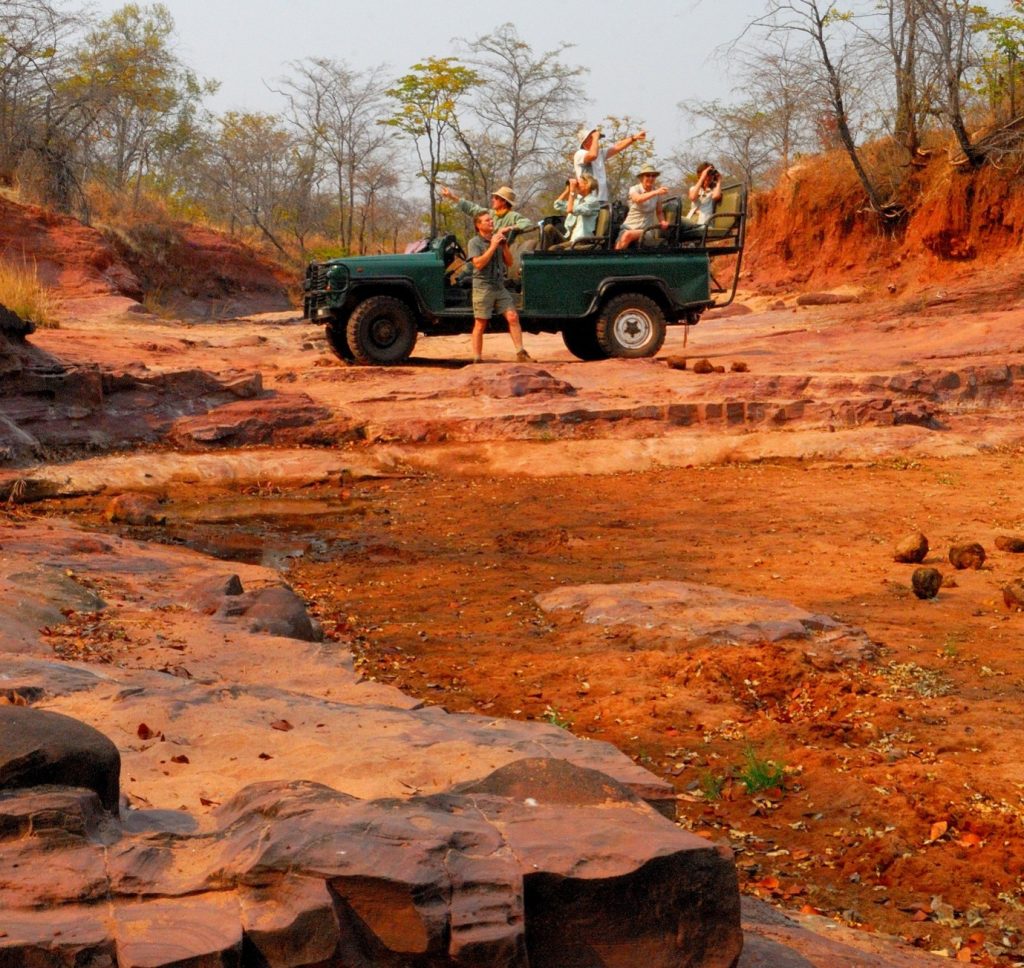
Your next safari?
At Safari Co we have travelled in Africa for over 30 years and arranged countless safaris. We’re keen photographers and with the exception of the image of the leopard in Zambia (a client’s photo) and those of the cameras and lenses featured we have taken all of the images in this photography guide.
If you’re a keen photographer we’d be really pleased to organise a specialised photographic safari for you. In any event we can arrange your safari that takes you to those special places where you will have the opportunity to capture amazing images. You’ll have seen from this guide that we can advise on where and when to travel and what equipment works well under the conditions that you’ll experience.
Call now: +442039294375 email: safari@safarico.uk or complete a CONTACT form.